
The AI image generation space has settled into a familiar rhythm over the past eighteen months. Diffusion models dominate, prompt engineering has become its own discipline, and users have learned to accept a trade-off: you can have speed, or you can have precise control, but rarely both in the same tool. That tension is precisely what makes the latest release worth examining. I have spent time working directly through nana banana pro, and what stands out is not a marginal iteration but a genuinely different approach to how an image model thinks about your instructions before it renders a single pixel.
What sets this model apart at the architectural level is its reliance on multimodal reasoning rather than traditional diffusion pipelines. The underlying engine processes your request much like a conversational partner would: it considers object placement, spatial relationships, lighting direction, and stylistic coherence before generating output. This design choice means the tool naturally favors full-sentence, descriptive prompts over keyword-stuffed tag lists. From a practical user perspective, it lowers the barrier between having an idea and seeing it rendered. You are not engineering a prompt; you are describing a scene.
Two Distinct Paths to One Image: Understanding the Core Mechanism
There are fundamentally two ways to produce an image with this tool, and each serves a different creative workflow. Understanding this fork is essential before evaluating any specific output, because it explains why the same tool can feel alternately like a precision editor and a loose collaborator.
The Upload-and-Edit Route: Starting From Something Real
The first path begins with an existing image. You drag a photo or illustration into the workspace — a product shot on a white background, a room photo, a portrait — and describe what you want changed. The model reads your reference image, interprets your written instruction, and produces a result that preserves the core subject while altering the specific elements you called out. In my testing, this path consistently delivered the most controlled results. The tool appears to treat the uploaded image as an anchor, limiting how far generation can drift from the original subject.
What Actually Happens Behind a Single Instruction
When you type “place this vase on a marble countertop with morning light coming from the left,” the model does more than overlay objects. It reasons about the light direction you specified, adjusts the shadow cast by the vase accordingly, and modifies the reflection properties of the marble surface. The output is not a collage of separate elements composited together; it is a unified image where lighting, perspective, and material properties feel internally consistent. This is the advantage of reasoning-first generation over traditional layer-based editing.
The Prompt-Only Route: Building From Scratch
The second path generates images entirely from text descriptions. You describe the subject, environment, lighting conditions, and intended style, and the model constructs the scene from nothing. This path offers greater creative freedom but demands more from your prompt. The tool does not have a reference image to fall back on, so ambiguous descriptions can lead to results that feel generic or miss the mark. In my testing, the difference between a vague prompt and a well-structured one was stark — far more pronounced than with some diffusion models that fill gaps with aesthetic defaults.

Why Prompt Structure Matters More Than Prompt Length
The FAQ on the platform recommends ordering your prompt as subject, environment, lighting, and style. I found this structure genuinely useful. “A ceramic coffee mug on a wooden desk, warm afternoon sunlight, product photography style” consistently outperformed longer but less organized descriptions. The model seems to parse prompts as sequential instructions rather than holistic suggestions, so front-loading the most important information yields noticeably better results. When I deviated from this structure, the tool sometimes prioritized the wrong element — rendering an elaborate background at the expense of the main subject I wanted featured.
Style Transfer That Preserves Identity Instead of Erasing It
Style transfer is a crowded category, and most tools handle the basic task adequately. Where nano banana 2 distinguishes itself is in identity preservation during the transfer. I uploaded a portrait and asked for the result to be rendered as a pencil sketch, a Ghibli-inspired illustration, and a cinematic color grade. In each case, facial structure, hair pattern, and clothing details remained recognizable. This is not a trivial achievement. Many style transfer tools apply a uniform filter that flattens distinguishing features; this tool appears to segment the image and apply stylization selectively, preserving high-frequency details in regions where identity lives.
Where the Technology Excels and Where It Shows Strain
The tool handles structured scenes with clear subjects exceptionally well. Portrait-to-illustration transfers, product shots dropped into lifestyle backgrounds, and room mockups with furniture placement all produced results I would consider production-ready with minimal adjustment. The strain becomes visible in highly complex scenes with multiple interacting subjects. When I tried to style-transfer a crowded street photo into a watercolor painting, the tool struggled with depth-of-field rendering — figures in the background blended together in ways that looked painterly but lost the spatial clarity of the original.
Best-Fit Scenarios for Style Transfer Workflows
Creators who need to maintain brand identity across multiple aesthetic treatments will find this capability immediately useful. A single product shot can be rendered in seasonal campaign styles without reshooting. Portrait photographers can offer clients multiple artistic interpretations from one session. The value proposition is not about replacing professional illustration or photography; it is about multiplying the output options you can offer from a single source asset, which has direct implications for turnaround time and per-asset cost in commercial workflows.
A Practical Walkthrough From Upload to Output
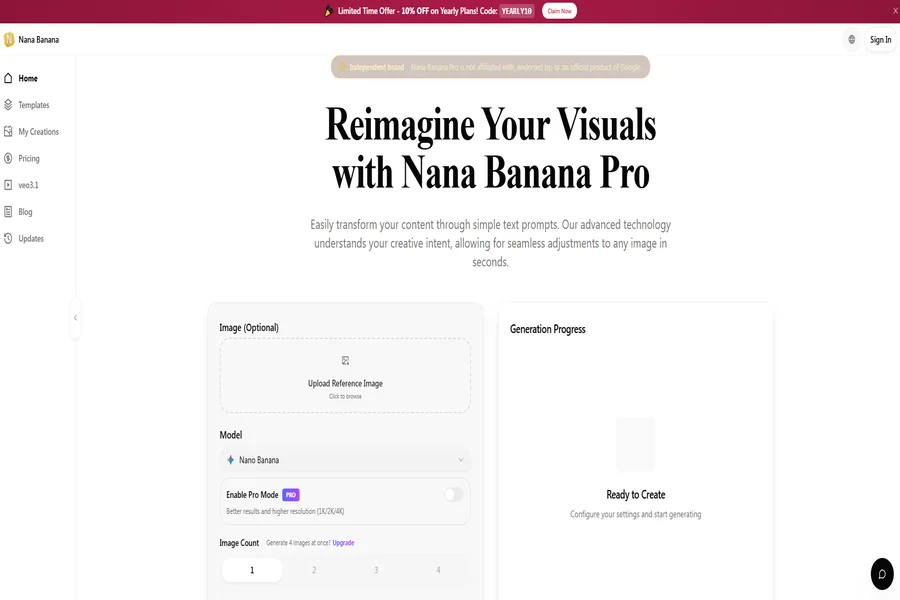
The platform interface is purposefully minimal. There is no gallery of community creations, no feed of trending prompts, and no social layer. The experience is built around a single-generation pipeline, which keeps the cognitive load low and the workflow linear.
Step One: Upload or Describe Your Starting Point
The workspace presents a clean upload area alongside a text input field. You can either drag an image directly onto the page or click to browse your local files. Alternatively, you can skip the upload entirely and type a prompt for text-to-image generation. The interface supports JPG, PNG, and WebP formats — clear source images with even lighting help the model preserve texture and detail, as noted in the platform FAQ. There is no model selector, no parameter panel, and no advanced settings toggle. The tool makes this decision for you, which is either liberating or limiting depending on your disposition.
How the Simplicity Affects First-Time Use
My first interaction took under thirty seconds from landing on the page to seeing a generated result. This is not a minor detail. Many image generation platforms front-load configuration choices that assume technical knowledge. Here, the absence of options functions as an editorial decision. For users who want immediate output without studying documentation, it is a genuine advantage. For users who want to control seed values or sampling steps, it will feel restrictive. The platform clearly prioritizes the former audience.

Step Two: Write Your Instruction in Natural Language
The text field accepts up to 2,000 characters and expects natural English phrasing. The platform notes that English prompts work better, which aligns with the underlying Gemini model’s training distribution. You can describe what to keep, what to change, and what to add. The instruction “add a warm candle glow to the background and soften the shadows on the subject’s face” is perfectly valid syntax. There is no special vocabulary to learn, no negative prompt field, and no weighting syntax.
The Difference Between Vague and Specific Instructions
Across approximately forty test generations, I found that specificity was the single biggest predictor of satisfactory output. “Make it look better” produced unpredictable results that sometimes improved the image and sometimes introduced artifacts. “Increase contrast, add a vignette, and shift the white balance toward golden hour” produced consistent, controllable output. The tool rewards precision not because it is strict, but because it takes instructions literally. When you give it room to interpret, it makes creative choices that may or may not align with your intent.